This post contains affiliate links. As an Amazon Associate I earn from qualifying purchases. If you click a link and make a purchase, I may receive a small commission at no extra cost to you.
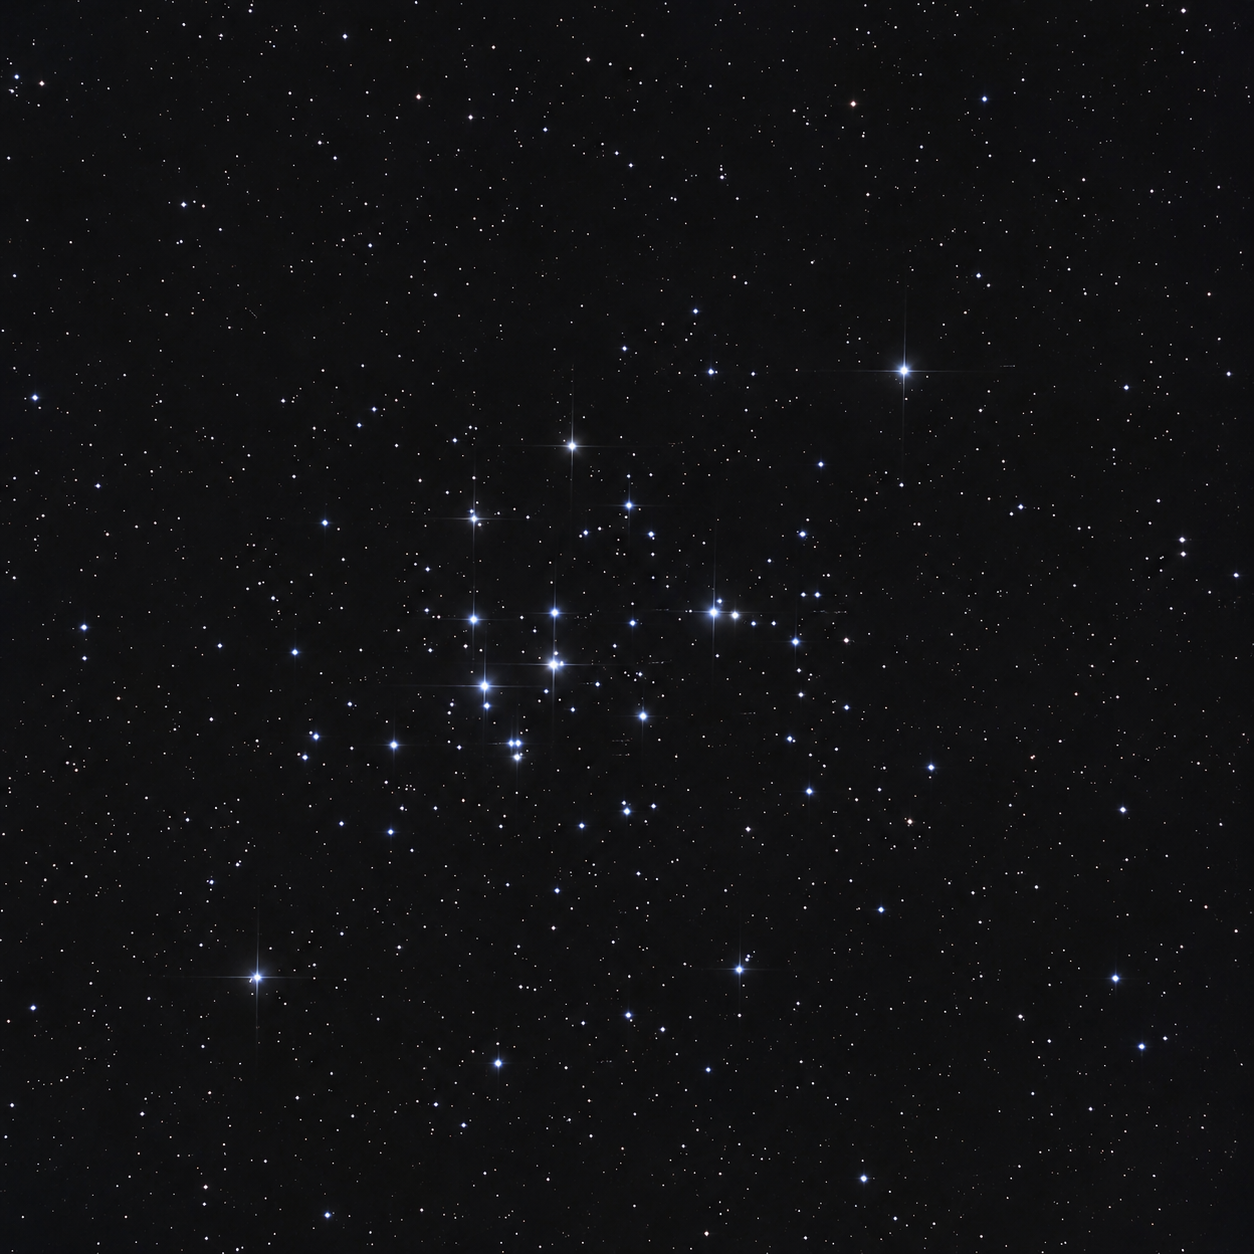
The Beehive Cluster is a great target, and it turned out to be one of the better fits I’ve found for the SeeStar S30 Pro so far. It’s elegant, large, and you can get some good practice capturing colorful stars.
Here’s how the session went.
Photo Details
- Object: M44 (The Beehive Cluster)
- Telescope: SeeStar S30 Pro
- Constellation: Cancer
- Exposure time: 10 seconds
- Duration: 48 minutes
- Bortle Zone: 7
- Conditions: Good transparency
About the Target
M44 sits about 600 light years away, making it one of the closer open clusters to Earth. It’s located in Cancer — a zodiac constellation right on the ecliptic, tucked between Leo and Gemini. It’s not a particularly flashy constellation, but M44 is the standout object in it, and for good reason.
What I find especially appealing about this cluster is the color contrast between its stars — warmer orange giants mixed in with cooler blue-white stars — and that contrast is something I really wanted to pull out in processing.
Field Notes
The field of view on the Seestar S30 Pro is pretty much perfect for the Beehive. It fills the frame well without feeling cramped or too zoomed out, and that made for some really beautiful star captures right from the start.
That said, the session didn’t begin without a hitch.
I set the scope on M44 and let it go, but as the first frames started rolling in I realized the targeting was noticeably off. The cluster was positioned well outside of where I expected it to be.
This is one of the more important things I’ve come to understand about shooting with the S30 Pro: you can’t just trust that it’s going to land exactly where it needs to and start taking images. You have to watch those first frames and verify.
It’s actually a lot like shooting the Milky Way and cranking your ISO way up just to check your composition before you commit to a shot. With the S30 Pro, you want to do something similar. Watch those early frames carefully, and if the framing is off, either manually move it or let it retarget after it’s had more time to calibrate. It’s a step worth taking before you walk away and let it run for an hour.
After a few minutes of adjustment I got it centered where it needed to be and let it go. There were still some frames rejected due to star trails, which was frustrating, but I also knew going in that an open cluster with bright stars like this doesn’t need a ton of total exposure to look good. I was fine landing around 45 minutes, and that’s almost exactly what I got.

Processing
My main goal going into processing was to bring out the color contrast between the stars. That that warm-cool split is what makes the Beehive interesting to look at, and I wanted it to actually show up in the final image.
I ran into real trouble in Siril though. It was giving me problems with the reference image, and I couldn’t get the stack sorted the way I wanted. Eventually I made the call to skip the manual stack and just work with what the app produced directly, which honestly wasn’t bad at all.
The bigger experiment this session was diffraction spikes.
I’ve become genuinely fascinated with the look of diffraction spikes on stars in astrophotography images. When done right, I think they add real depth and drama.
That said, I also think a lot of people overdo it. When every single star in the frame has spikes, the effect loses its power. Something about the depth just doesn’t hit the same way. Applying it selectively to a few of the brightest stars is where the magic is.
I know masks exist that produce spikes optically, but I don’t currently have one of those.
So I started looking into software that could do it selectively. Most of what I found was either Windows-only, hosted on sketchy unsecured sites, or experimental. Nothing felt solid. I ended up putting the image into ChatGPT and prompting it to add realistic diffraction spikes to a handful of the brightest stars only.
I’ll be honest about where I stand on this. I generally don’t like generative AI, and I have zero interest in AI-generated images of deep sky objects — fabricated galaxies, fantasy nebula composites, none of that.
But I don’t think in black and white about it either. When AI is being used to make small, targeted adjustments that maintain the actual structure, color, and integrity of a real image — doing something I’d otherwise do in dedicated software if I could find the right tool — I don’t see the harm in going that route.
In this case, GPT did a solid job. The trade-off is that it softened some of the color contrast between the stars, which was the thing I was most trying to preserve. So that part stings a little. I’m also not sure if it altered the stars in the background.
But I’m still in early experimentation mode, and for where I am right now it worked well enough to be worth sharing. I still want to find a proper pipeline that lets me really pop those colors without giving anything up. When I get there, I’ll come back to the Beehive.

Final Word
The S30 Pro is starting to make more sense to me the more I shoot with it. I’m getting a clearer picture of what it actually excels at: large emission nebulae, globular clusters, and now open clusters like M44. For this one, the field of view was genuinely ideal — the cluster fills the frame, the stars are bright and well-resolved, and the color in there is real if you can get the processing right.
For galaxies later in the summer, I’m curious to see how it handles targets with more angular size. But right now, the Beehive was a good reminder that sometimes the scope is just a natural fit for what you’re pointing it at.